Setup Instructions for Creating Vehicle Sliders
Use the following steps to create a new gallery and add both images and thumbnails to the new gallery.
Use the following steps to create a new gallery and add both images and thumbnails to the new gallery.
1. To create a new slider, first login into the backend and navigate and then click Master Slider along the left-side navigation menu.
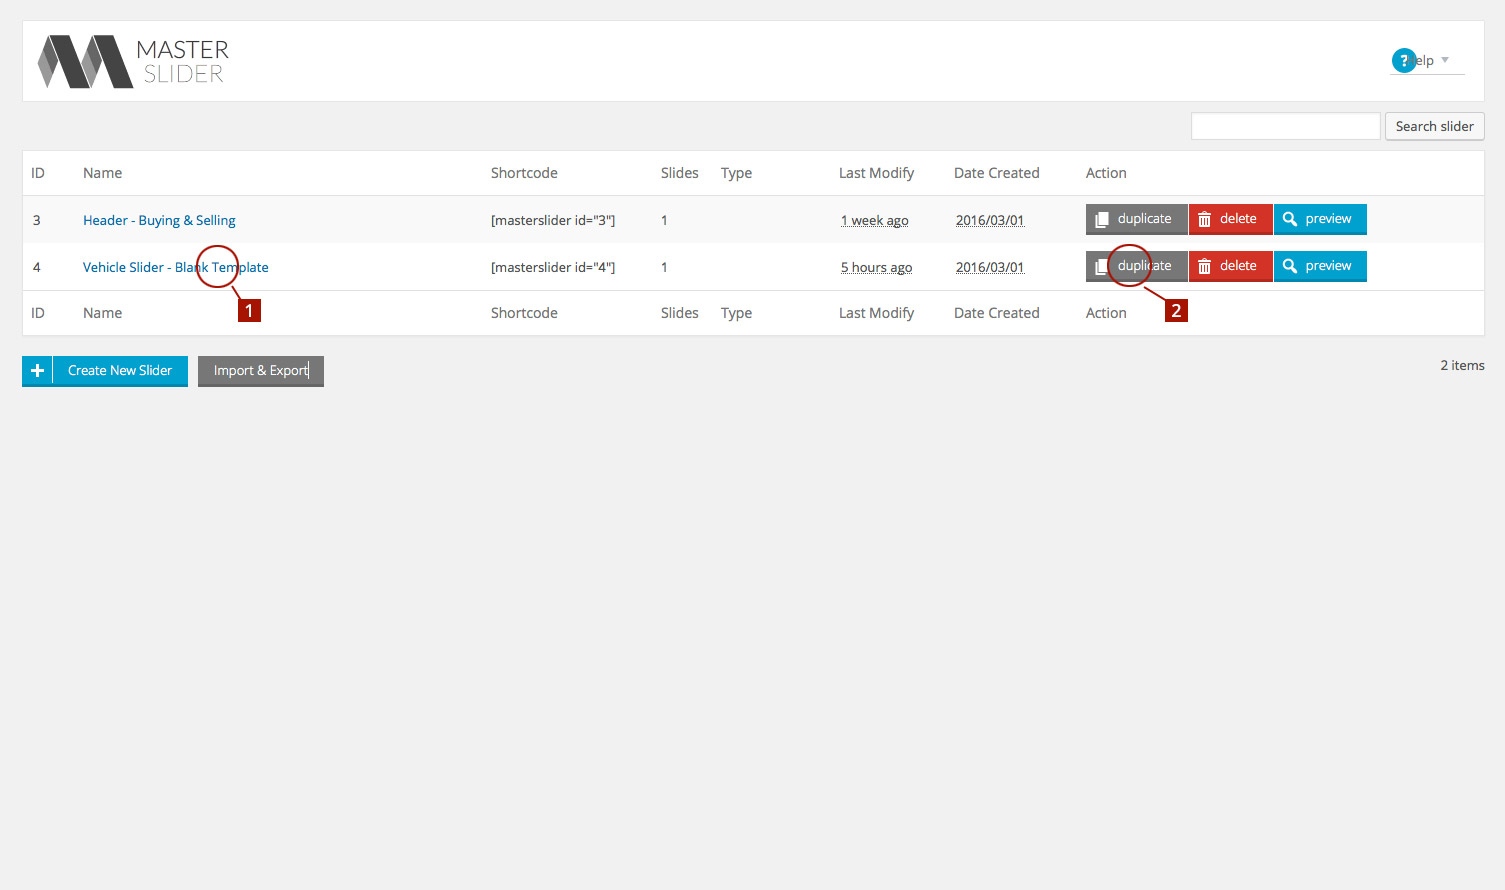
2. Once in Master Slider, locate the existing slider labeled Vehicle Slider – Blank Template (1) and then click the Duplicate button under the Action menu (2).
3. After the new slider is duplicated, click on it’s title to open it. Select the Slider Settings tab to rename it to match the title of the vehicle where it will be used, i.e. if images are of the 911 Yellow Boxter S, the the slider title should be the same. This makes the process of selecting the slider from a list much easier later on.
4. Click Save Changes along the bottom of the screen.
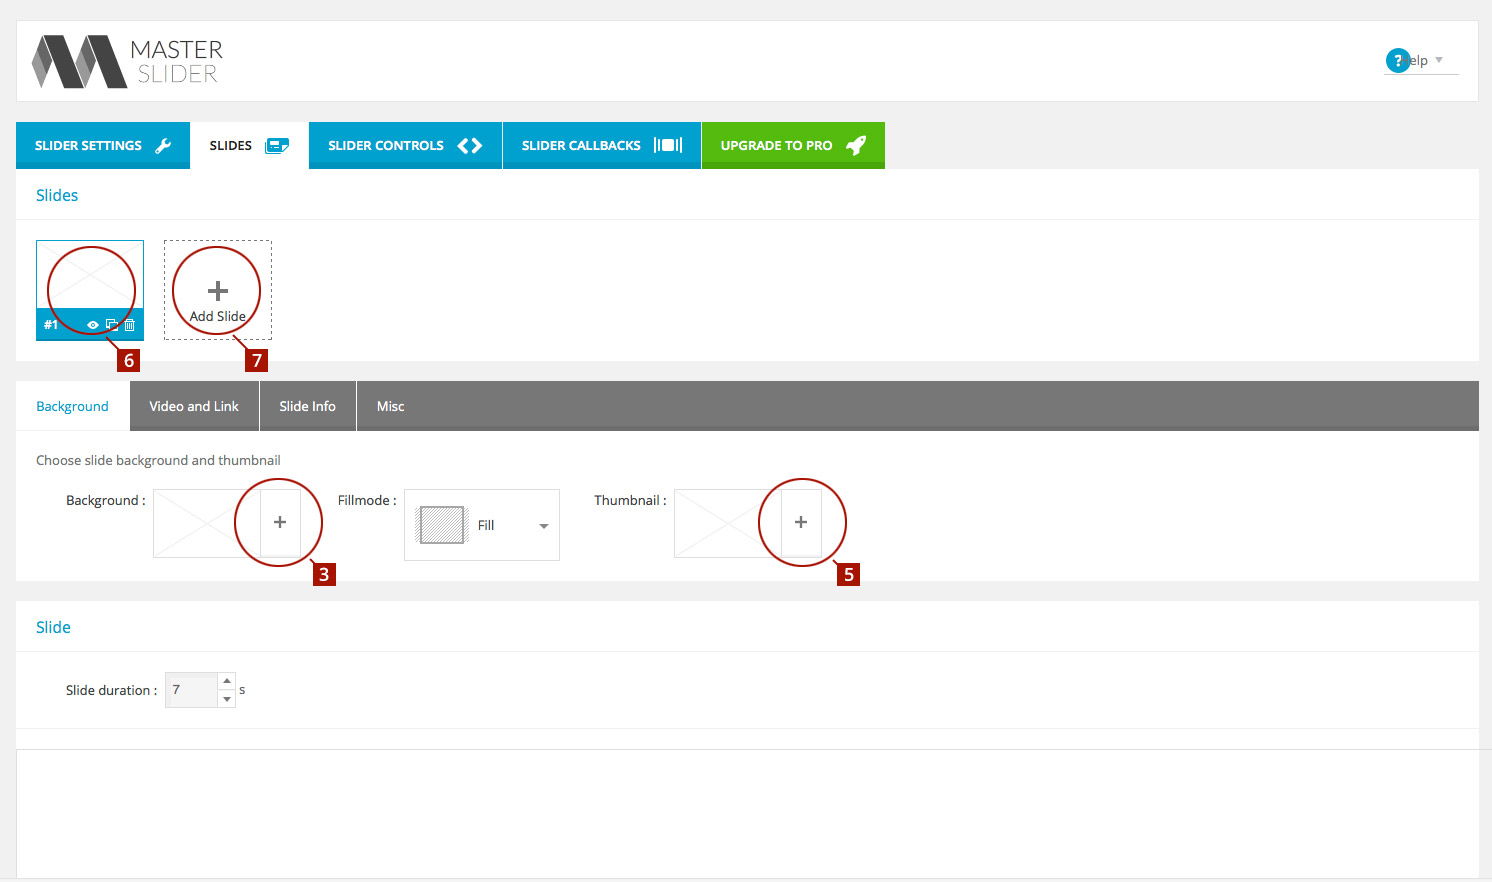
5. Once renamed, open to the Slides tab to begin adding slides and thumbnails to your slider. Click the + button (3) next to the Background window to open the Media page.
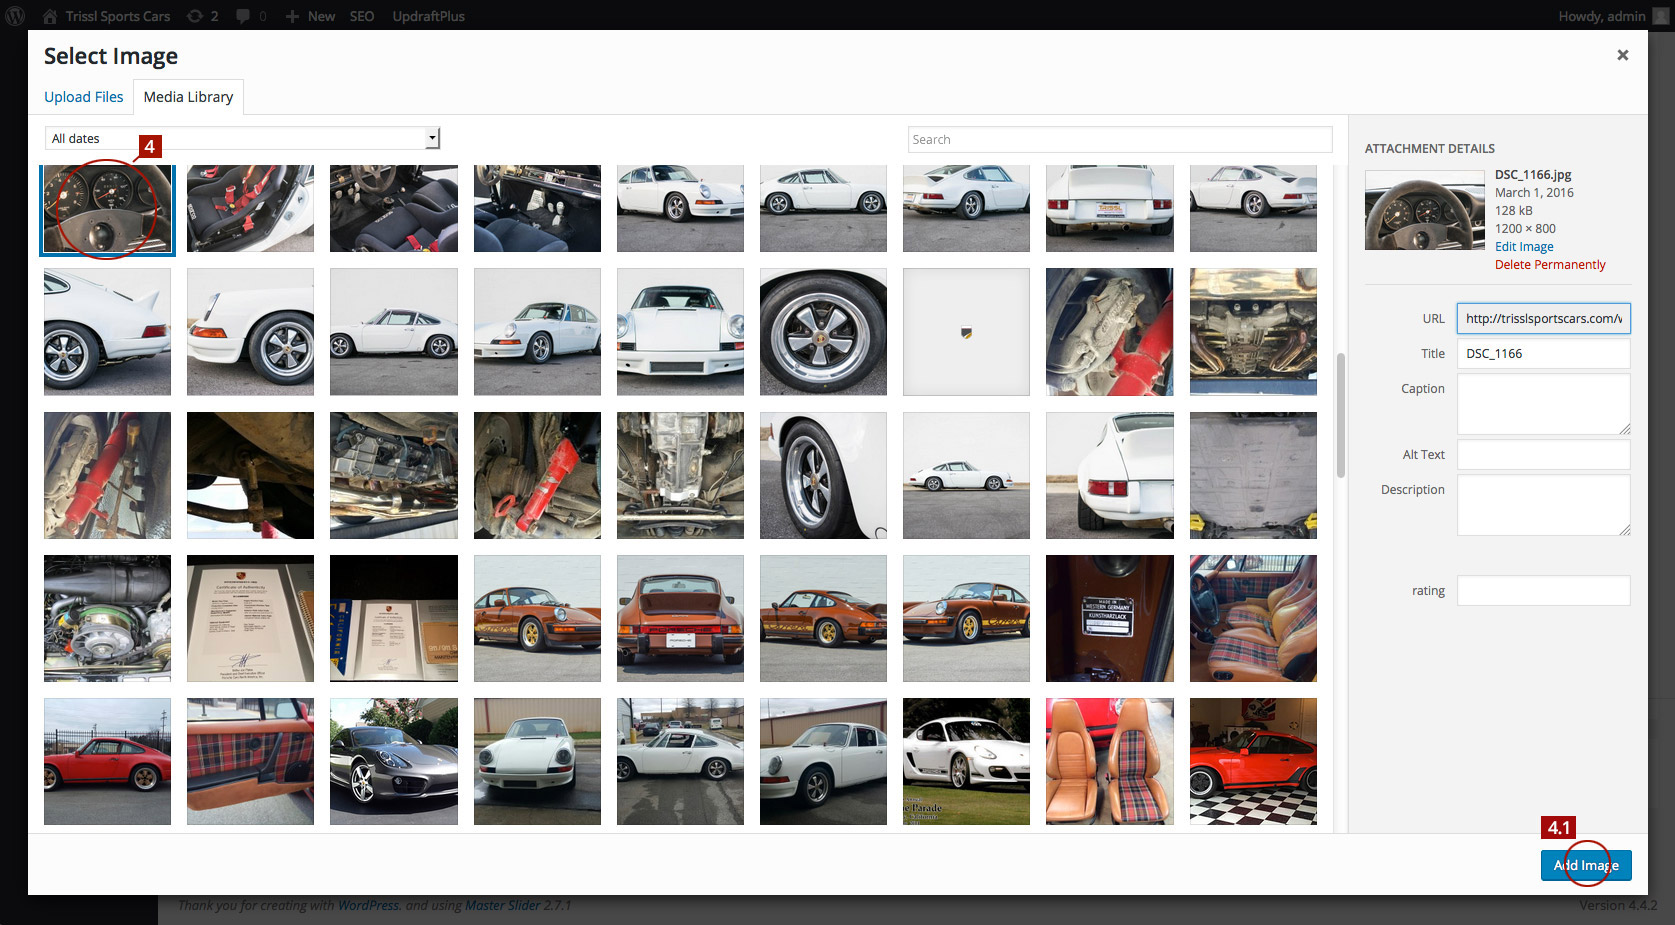
6. With the Media window open, upload both the slider images and thumbnails for a single vehicle* (if not already uploaded).
*It’s best to name the larger slider image and thumbnail the same and append the thumbnail to make it easier to pair them up while still telling them apart from each other.
7. Select the the larger slider image to be used (4) and then click Add Image (4.1). With the new slide added, you’ll see it displayed in the current slides window (6).
8. Repeat steps 5-7 for adding the Thumbnail image (5). This completes the addition of the slide.
9. Continue to add additional slides as needed by clicking the Add Slide button (7) for a new blank slide.
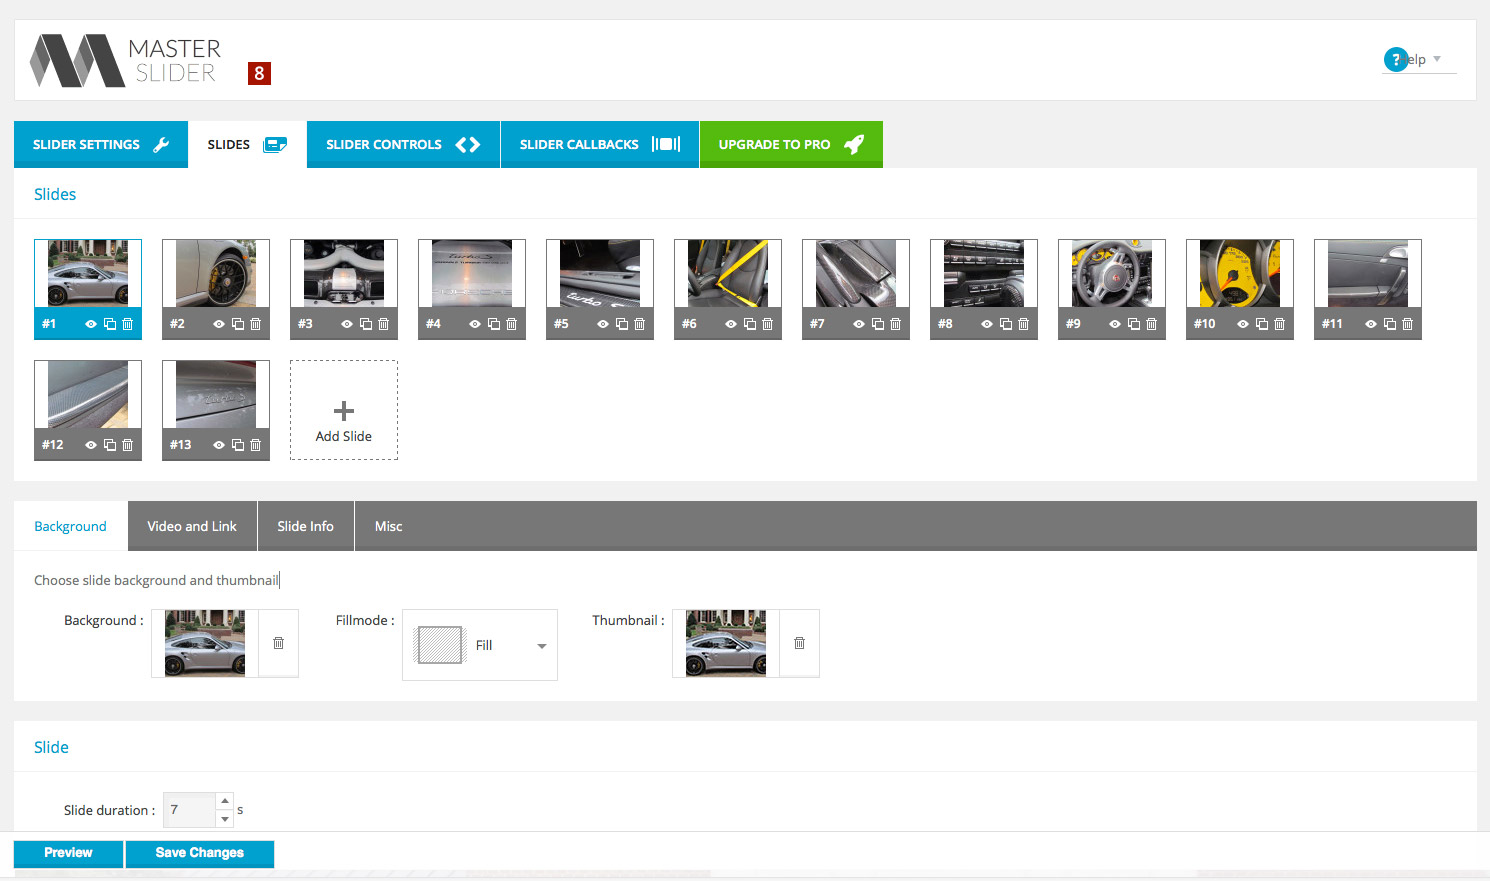
10. Once all slides are added, click the Save Changes button along the bottom. The final slider should like like figure (8) when complete.
11. With all slides added, the slider is ready to be installed in the vehicle’s main page.